Tell your friends you're making doughnuts and they'll be super impressed... What they don't know, is that they're SUPER easy to make. I know I always say that just about every recipe I make, but really, that's why I make them... I love cooking but not working, so I try to make it all simple. TRY THIS! If you like doughnuts that is... :)
In a pot, melt 1 stick of room temp butter with 1/2 cup of water.
Then add in 1/4 cup of sugar and pinch of salt. Stir until sugar is melted
Turn the heat off, and stir in 1 cup of flour a little at a time.
Turn heat back on low-med. and keep stirring just to cook off the raw flour taste
Put the dough in a stand mixer and add 3 eggs plus one yoke, one at a time as they get mixed into the dough.
(optional: Add the zest of an orange or lemon)
Let that dough sit in the fridge for about 15 minutes while you heat up vegetable oil in a big pot to fry the doughnuts.
Scoop the batter with a small ice cream scoop into the oil when it reaches 375oF
Cook them in batches of two or 3 depending on how big your pot is. You don't want them to all stick together.
While those fry...make the glaze:
Into a bowl, whisk 1/4 cup of heavy cream, 2 tbsp of chocolate powder (or espresso powder) 1 tbsp of vanilla extract (or chocolate liquor, or coffee liquor).
Then with a wooden spoon stir in 2 cups of powdered sugar a little at a time.
It's going to seem a little dry at first, and you may have to add in some water, but keep mixing for a while to make sure. It will eventually get very creamy!
Dip each doughnut just half way into the glaze
Set them on a wire on a top of a pan to let the excess cream drip from them.
Serve them nice and warm!
Saturday, June 25, 2011
Tuesday, June 21, 2011
I would LOVE...
some new recipes from you guys!!!
I love creating and inventing new stuff and I've been wanting to make some food out of my comfort zone and out of the box that I usually think of stuff to cook... please send some of your favorite ones. I'd love to try to make some new recipes :D
I love creating and inventing new stuff and I've been wanting to make some food out of my comfort zone and out of the box that I usually think of stuff to cook... please send some of your favorite ones. I'd love to try to make some new recipes :D
If you can't go to Spain, just make this Paella at home
One of my husband's favorite meal is Paella. He had it when he traveled to Spain and absolutely love it. Well since he asked for it all the time, and I couldn't let some woman in Spain be better at making Paella then me, I had to get good at making it. Well after making it a couple days ago and adding a couple ingredient I never had before, I think I finally mastered the famous Spanish rice dish. It might seem a little too many ingredients and steps at first, but it's a one pot meal and everyone will go CRAZY for this dish.
You will need:
One large non stick skillet. And I mean LARGE.
2 tspb of oil, divided
2 cloves of garlic
1/4 lb chopped pancetta (a key ingredient in this dish**)
1 lb of already cooked and chopped or sliced chicken breast
1/2 lb smoked sausage (fully cooked) sideway sliced...Idk how else to describe it lol
1/2 lb of shrimp
1 onion chopped
1 small can of peas
1 tomato chopped
4 or 5 green olives chopped
1/4 cup tomato sauce
2 cups of rice
2 cups of chicken stock or broth
1 cup of water
1 cup of chopped green, yellow, and red peppers
2 tsp of saffron* (**)
2 eggs
1/4 cup chopped parsley
1/2 lemon juice
salt n pepper to taste
*if you can't find saffron or it's a little too much for your budge, look in the spanish or sometimes mexican section of your grocery store and they have little packets of seasoning with saffron in it. That'll work too, you just might have to reduce the amount of salt if you use it.
I didn't take a picture of it when I made it...but for some reference...here's kinda what it should look like so you have an idea:
And by the way, you can certainly add mussels into this dish. Most of the ones in Spain have it.. It's just hard and expensive to find fresh mussels these days and it complicates the recipe a tad so I always opt out of it... :)
You will need:
One large non stick skillet. And I mean LARGE.
2 tspb of oil, divided
2 cloves of garlic
1/4 lb chopped pancetta (a key ingredient in this dish**)
1 lb of already cooked and chopped or sliced chicken breast
1/2 lb smoked sausage (fully cooked) sideway sliced...Idk how else to describe it lol
1/2 lb of shrimp
1 onion chopped
1 small can of peas
1 tomato chopped
4 or 5 green olives chopped
1/4 cup tomato sauce
2 cups of rice
2 cups of chicken stock or broth
1 cup of water
1 cup of chopped green, yellow, and red peppers
2 tsp of saffron* (**)
2 eggs
1/4 cup chopped parsley
1/2 lemon juice
salt n pepper to taste
*if you can't find saffron or it's a little too much for your budge, look in the spanish or sometimes mexican section of your grocery store and they have little packets of seasoning with saffron in it. That'll work too, you just might have to reduce the amount of salt if you use it.
- In the large skillet, with 1 tbsp of oil, cook the pancetta until it's nice and crisp.
- Remove the pancetta to a large bowl or plate with a slotted spoon leaving the fat in the skillet.
- Throw in the onions and brown them..about 2 mins.
- Push the onions to the side of the skillet and
- break in the 2 eggs stirring them so they will scramble.
- Remove the egg when it's scrambled on the plate with the pancetta.
- Then add the shrimp first and cook until pink about 2-3 minutes with a pinch of salt,
- then add chicken and sausage for a couple more minutes.
- Remove those to the bowl with pancetta and scrambled eggs.
- Next, add in the peppers and garlic.
- Leaving those in there, add another tbsp of oil and add in the rice, stir frying them for about 1-2 minutes.
- Then add the chicken stock and water,a couple pinches of salt and the saffron.
- Stir, bring to a boil, then reduce heat to med-low, cover and let simmer for about 15-20 minutes or until rice is tender, checking about once or twice to see if it needs more water.
- When the rice is cooked add the tomatoes and tomato sauce, stir
- and then add the original mix and remaining ingredients all back into the skillet and mix all together. (by now you should have all the ingredients in there)
- If yours turns out a little mushy, put it in the oven under a high broil for about 2 minutes and it should turn it into a more fried rice texture, like it should be.
I didn't take a picture of it when I made it...but for some reference...here's kinda what it should look like so you have an idea:

And by the way, you can certainly add mussels into this dish. Most of the ones in Spain have it.. It's just hard and expensive to find fresh mussels these days and it complicates the recipe a tad so I always opt out of it... :)
Monday, June 6, 2011
To-die-for-gooey-chocolate-lava-cake
I know I said I'd post the green tomatoes and onions au gratin next, but I just made these, and they were soooooooooo good I just couldn't wait to post this recipe!!!
- 4 oz bittersweet chocolate squares or chips
- 4 oz semisweet chocolate squares or chips
- 10 tablespoons (1 1/4 stick) butter
- 1/2 cup all-purpose flour
- 1 1/2 cups confectioners' sugar (reg sugar works fine too)
- 3 large eggs
- 3 egg yolks
- 1 teaspoon vanilla extract
- 2 tablespoons orange liquor (OR just squeeze half an orange into the mixture)
Grease 6 6oz custard cups. In a large bowl, melt the chocolates and butter in the microwave (about 2 minutes stirring once in between). Stir in the flour and sugar. Then the eggs and yolks until smooth, and the vanilla and orange liqueur (or orange juice). Divide the batter evenly among the custard cups. Place in the oven and bake for 14 minutes on 425. Don't try sticking a fork in the middle, cus it won't come out clean...duh! it's a lava cake!
Kevin ate two of them right off the bat, he loved how moist and gooey they were! It's so easy you've gotta try it!
Sunday, June 5, 2011
A Little Fancied Up Southern Cooking
We're going to take some of my favorite southern classics that I loved having in Charleston, SC and fancying them up just a tad so you can impress your friends and still take them back home to the south with every bite.

For my crab cakes with Mango salsa you'll need:
For crab cakes-
For the mango salsa-
Now, if you don't like grits, PLEASE PLEASE PLEASE try these, they are to die for! I promise you'll like them regardless of your feelings about grits! They are divine!
You'll need:

For my crab cakes with Mango salsa you'll need:
For crab cakes-
- 1 pound crab meat (you don't have to get the expensive kind. canned ones will do fine)
- 1/3 cup crushed crackers or bread crumbs
- 2 green onions finely chopped
- 1/4 cup green bell peppers
- 1/4 cup red bell peppers
- 1/4 cup mayonnaise
- 1 egg
- 1 teaspoon Worcestershire sauce
- 1 teaspoon dry mustard (optional)
- 1/2 lemon, juiced
- 1/4 teaspoon garlic powder
- 1 teaspoon salt
- Dash cayenne pepper
For the mango salsa-
- 1 mango, peeled and diced
- 1/4 cup finely chopped poblano peppers
- 1/4 cup " " red bell peppers
- 1/4 cup " " red onion
- 1 1/2 tsp minced garlic
- 1/2 cup rice wine vinegar (OR you can use about 1/4 cup red wine and 1/4 cup reg. rice vinegar)
- a little bit of chopped cilantro and salt to taste
Now, if you don't like grits, PLEASE PLEASE PLEASE try these, they are to die for! I promise you'll like them regardless of your feelings about grits! They are divine!
You'll need:
2 quart chicken stock
1/2 cup heavy cream
1 cups Dixie Lily grits
4 tbsp of butter
1 (8oz)can creamed corn
1/4 pound shredded smoked Gouda cheese
1/2 cup heavy cream
1 cups Dixie Lily grits
4 tbsp of butter
1 (8oz)can creamed corn
1/4 pound shredded smoked Gouda cheese
Boil the chicken stock in a large pot. Mix in the grits and stir A LOT!!! Reduce it to a simmer and cook for 40 minutes, stirring occasionally. Add the cream, then butter and creamed corn and stir it until it's all together. Gradually stir in the cheese until it's all nicely blended. And enjoy one of the South's best dish!
I will post the green tomato and onion au gratin soon :)
Tuesday, May 31, 2011
Filipino food...Yum!!
My parents used to have a friend when we lived in Lancaster, South Carolina that was from the Philippines and cooked the most amazing food. So, since I was home with some time to spare, we decided to try to recreate it... and it was DELICIOUS! You've got to try these! And we thought it was going to be kind of hard, but it ended up being super easy!
So, here's how to make some of their best: Lumpia Shanghai.
Lumpia is a Filipino version of egg rolls, but they're much better and full of meat!

You will need:
Egg roll wrappers
1 lb of ground pork, chicken or beef (I prefer pork, but any will work)
2 cloves of garlic, minced
1/2 medium onion finely chopped
1/2 carrot, grated
1/2 cup chopped green onions
1/2 cup shredded cabbage
1/4 cup soy sauce
salt n pepper to taste
1/2 tsp of garlic powder
1 package spring roll wrappers
and oil for frying (about 2 cups, depends on what pan you use- the oil needs to just barely cover the lumpia when you're frying them)
So first cook the meat in about 2 tsp of olive oil or veg. oil and the garlic, salt and pepper until it's brown. Then add in the rest of the ingredients and cook for about 2 minutes. Take pan off heat and let it cool.
You're wrappers should come with a diagram instruction on the back of them which is super easy to follow on how to assemble them, but if not, here's how:
When it's cool enough to handle, place 2 heaping tablespoons of the filling diagonally near one corner of each wrapper, leaving a 1 1/2 inch space at both ends. Fold the side along the length of the filling over the filling, tuck in both ends, and roll neatly. Keep the roll tight as you assemble. Moisten the other side of the wrapper with water to seal the edge.
Then fry them in batches of 3 or 4 in the veggie oil. These fry VERY fast, so keep an eye on them. It should only take about a minute or less.
I promise, you'll love them.
Next, I'll post a recipe for those yummy noodles you see beside the Lumpia called Pancit Bihon. It's made from rice sticks, which is a white super thin version of a lo-main noodle. Dee-lish!
Tuesday, May 17, 2011
Going home= new recipes :D
I'm excited to be going home to Charlotte for the week this weekend where I'll get to cook a bunch of new things for my mom and dad.
I'll take lots of pics of the finish products and when I come back I will post everything I've made.
It'll be fun to be able to cook exciting things, cus at home I have to cook a little boring for Kev...he doesn't like fancy things (like vegetables lol).
I'll take lots of pics of the finish products and when I come back I will post everything I've made.
It'll be fun to be able to cook exciting things, cus at home I have to cook a little boring for Kev...he doesn't like fancy things (like vegetables lol).
Sunday, May 15, 2011
Olive Garden Breadsticks...Nough said.

So, after much research, I've found the original recipe for those Olive Garden bread sticks everyone fights over and immediately shouts "Yes, please!" when the waiter asks if you want more. So I figured I'd give it a try, and they turned out GREAT!
The recipe itself is super easy, the hard part, or super duper fun part for me, is all the kneading and waiting you will have to do. Plan on making these about 2 hours before dinner time..
So, Check it out:
First, dissolve: 3/4 tbsp active dry yeast
2 tbsp granulated sugar
1 cup + 1 tbsp warm water
(for about 5 minutes)
Preferably in a stand mixer:
Second, mix: 3 cups of flour
1 1/2 tsp salt
then:add to the mixture 1/4 cup butter (soft)
When that's mixed, add the yeast mixture and mix. No mixer will be enough to make this bread good though... You're gonna have to get your hands in it!
On a working surface, spread some flour over it and start kneading the dough. You'll need to do this for about 10 mins... Really put some weight into it! This is your work out to burn the calories you're going to be eating from these bread sticks. You know you're not just going to eat one!
Then make the dough round and set it in a bowl sprinkled with flour and cover it with a cloth. Let it sit for 1 hour.
Then take the dough in a working surface with flour again and roll it out a bit. Cut the dough into about 10-12 slices. Then roll them back up into balls, and start rolling them into sticks with your hands. They should be about 7 inch round sticks.
Set the bread sticks on a baking pan covered with parchment paper and let it sit for another hour.
Then, in a small bowl, make a mixture of: 2 tbs of butter
1/2 tsp of garlic salt
Brush the breadsticks with the butter mix and then bake for 12 mins or until golden brown on 400 degrees F.
When the come out of the oven give them a quick brush with butter again, and eat them with your favorite Italian meal.
Pork Scallopini with Cheese filled shells in white wine cream sauce coming up soon! :D
Monday, April 11, 2011
Great low-calorie snacks
This will be a continuing post. Anytime I think of more stuff, I'll post it on here, so keep checking it to stay healthy!
So, I'm not big on having huge lunch and dinners but I snack all day long! I just constantly crave food and I think my body's taught itself to just eat in small portions that way I can eat all day long! It's the best, I think.
But obviously, most snacks can be packed with calories and just plain bad for you. So try these
For a salty snack:
So you know how we all love eating popcorn but we always think its so fattening. WRONG. If you buy fat free popcorn it only has about 15 calories per 1 cup! that's like, awesome!!
so, buy some fat free popcorn (they even have butter ones). And I know you're thinking "gross", but here's how you make it good:
first make sure you separate it into thirds. You dont need to eat the whole bag for a snack. But popcorn in general has super low calories so even if you end up eating half, you're really only getting about 30 calories.
Add some olive oil, instead of butter. You won't even notice the difference, I promise. If anything, I think it tastes way better. A/b a tsp of salt, and pile in some fresh herbs like parsley, rosemary, basil, and oregano. Chives is a great choice too. Then just sprinkle a tsp of grated Parm. cheese.
This entire snack, even if you do end up eating the whole bag, will only end up being around 50 calories, which is excellent, and it taste great too!
Laughing Cow Light French Onion or swiss cheese spread on salt-free-fat-free saltine crackers is also a great healthy snack.
TUNA! tuna's the BEST! so low calorie and so good. Mix 1 tuna can with 1 can of corn and 1 can of peas and ab 1 tbsp of fat free mayo and 1 tsp of olive oil, a little salt, pepper, rosemary and mix it all together. Eat it with some crackers and its a meal in itself.
Or: in a food chopper, chop 1/8 cup onion, 1/8 cup tomatos, 1 can of tuna, 1 tbsp of fat free cream cheese and 1 tbsp of fat free mayo. Add salt, pepper and garlic powder to taste. Spread on those saltine crackers!!
Pita pizzas-amazing and about 120 calories for a whole mini pizza...CRAZY!
buy some white pita bread... like the big size ones that look
like a mini pizza>
-spread one wedge of Laughing Cow LIGHT swiss cheese (or whichever flavor you like, just make sure its light)
-drizzle some olive oil on top.
- tear up little pieces of really thinly sliced smoked turkey breast, OR chicken breast, OR tuna
-cut about 4 olives up and spread of it (you dont want too many because its got high sodium but just a few to add a salty bite.)
- half of a tomato cut in slices
-and then you can get creative with veggies: peas, fresh spinach, arugula, bell peppers, mushrooms, onions----whatever veggies you like, pile it on there because that way you will feel full and have a big meal, but its all of really healthy stuff.
-add lots of fresh basil, oregano, or rosemary on top.
-broil it on low or bake on 425 for a few minutes...
this is so good, so simple, and SUPER low in calories. what more could ya want??
For sweets:
Who doesn't love a great parfait??
Well most parfaits that you buy are loaded with about 300 calories. For one because of the granola, and because it's usually not fat free yogurt. So, since I LOVE parfaits, I always have a big container of vanilla fat free yogurt in the fridge, and Special K fruits and yogurt in the pantry. Make yourself a super easy-super low calorie parfait by adding about 1/2 cup of yogurt and top it off with a/b 1/4 cup of Special K and you'll have yourself a treat!!
Another way I love using Special K (because it tastes great and it has 100 calories in 1 full cup of cereal) is by slicing some bananas and mixing some with it in a bowl. It's crunchy and healthy and just plain good!
Get in the habit of making smoothies. Using some fat free skim milk and fruits like orange, banana, strawberry and mango, tossing it all in a blender with some ice, you can make some great fruit smoothies that are super low calorie and good for you. Add some splenda if you need the extra sweetness. But if you make an entire large cup of these, it can even be replaced for a meal.
These are just a few to start; to be continued soon....
So, I'm not big on having huge lunch and dinners but I snack all day long! I just constantly crave food and I think my body's taught itself to just eat in small portions that way I can eat all day long! It's the best, I think.
But obviously, most snacks can be packed with calories and just plain bad for you. So try these
For a salty snack:
So you know how we all love eating popcorn but we always think its so fattening. WRONG. If you buy fat free popcorn it only has about 15 calories per 1 cup! that's like, awesome!!
so, buy some fat free popcorn (they even have butter ones). And I know you're thinking "gross", but here's how you make it good:
first make sure you separate it into thirds. You dont need to eat the whole bag for a snack. But popcorn in general has super low calories so even if you end up eating half, you're really only getting about 30 calories.
Add some olive oil, instead of butter. You won't even notice the difference, I promise. If anything, I think it tastes way better. A/b a tsp of salt, and pile in some fresh herbs like parsley, rosemary, basil, and oregano. Chives is a great choice too. Then just sprinkle a tsp of grated Parm. cheese.
This entire snack, even if you do end up eating the whole bag, will only end up being around 50 calories, which is excellent, and it taste great too!
Laughing Cow Light French Onion or swiss cheese spread on salt-free-fat-free saltine crackers is also a great healthy snack.
TUNA! tuna's the BEST! so low calorie and so good. Mix 1 tuna can with 1 can of corn and 1 can of peas and ab 1 tbsp of fat free mayo and 1 tsp of olive oil, a little salt, pepper, rosemary and mix it all together. Eat it with some crackers and its a meal in itself.
Or: in a food chopper, chop 1/8 cup onion, 1/8 cup tomatos, 1 can of tuna, 1 tbsp of fat free cream cheese and 1 tbsp of fat free mayo. Add salt, pepper and garlic powder to taste. Spread on those saltine crackers!!
Pita pizzas-amazing and about 120 calories for a whole mini pizza...CRAZY!
buy some white pita bread... like the big size ones that look
like a mini pizza>

-spread one wedge of Laughing Cow LIGHT swiss cheese (or whichever flavor you like, just make sure its light)
-drizzle some olive oil on top.
- tear up little pieces of really thinly sliced smoked turkey breast, OR chicken breast, OR tuna
-cut about 4 olives up and spread of it (you dont want too many because its got high sodium but just a few to add a salty bite.)
- half of a tomato cut in slices
-and then you can get creative with veggies: peas, fresh spinach, arugula, bell peppers, mushrooms, onions----whatever veggies you like, pile it on there because that way you will feel full and have a big meal, but its all of really healthy stuff.
-add lots of fresh basil, oregano, or rosemary on top.
-broil it on low or bake on 425 for a few minutes...
this is so good, so simple, and SUPER low in calories. what more could ya want??
For sweets:
Who doesn't love a great parfait??
Well most parfaits that you buy are loaded with about 300 calories. For one because of the granola, and because it's usually not fat free yogurt. So, since I LOVE parfaits, I always have a big container of vanilla fat free yogurt in the fridge, and Special K fruits and yogurt in the pantry. Make yourself a super easy-super low calorie parfait by adding about 1/2 cup of yogurt and top it off with a/b 1/4 cup of Special K and you'll have yourself a treat!!
Another way I love using Special K (because it tastes great and it has 100 calories in 1 full cup of cereal) is by slicing some bananas and mixing some with it in a bowl. It's crunchy and healthy and just plain good!
Get in the habit of making smoothies. Using some fat free skim milk and fruits like orange, banana, strawberry and mango, tossing it all in a blender with some ice, you can make some great fruit smoothies that are super low calorie and good for you. Add some splenda if you need the extra sweetness. But if you make an entire large cup of these, it can even be replaced for a meal.
These are just a few to start; to be continued soon....
Sunday, April 10, 2011
Polenta Frita
If you've never had fried polenta....man, you just don't understand what you've been missing!!!! It's definitely not a famous thing in the US...but in Brasil, pretty much every restaurant you go too will have these in their menu. There's many different kinds of polenta...my grandpa eats it with milk, which is something I'll NEVER understand haha, but anyways, my favorite, and what I think is the best kind is fried.
And this is SO easy to make, you're going to kick yourself for never have made it before. And then you're probably going to do it for every meal for the rest of your life.
So first before we make "fried" polenta, we have to make regular polenta.
SO EASY
all you need is:
6 cups chicken stock
1 3/4 cups YELLOW cornmeal
3 tsp unsalted butter
1 tsp salt
Boil the water in a havey large saucepan. Add salt. Gradually whisk in the cornmeal. Reduce the heat to low and whisk until the mixture thickens.
This is the secrete to making good polenta. It's tough but you're gonna have to sit there and whisk this thing for about 15 minutes. That's why it's so good, you gotta put a lot of love into it :)
Then turn off the heat, and stire in the butter until its melted.
Then cover a large baking dish with foil, letting some hang off the sides and pour the polenta into it. Cover the top with foil and put it in the freezer for about 45 minutes. Or if you're making it in advance you can refrigerate it for about 2 hours.
When the polenta is semi-hard, cut the polentas into 2 by 1 in. pieces.
In a large frying pan, coat the pan with olive oil and fry the pieces about 4 at a time on medium high heat for about 3 minutes on each side.
Place the fried pieces on a plate with paper towels and sprinkle parmesan cheese on top.
These things are better then the best fries you've ever had. Simply amazing! You've GOT TO TRY IT!!

Chicken Adobo-Super duper yummy!

I know I always say things are easy, but this is really easy, and super delicious. Please try it!
All you need is:
- 6 chicken drumsticks
- 1/2 cup white wine vinegar
- 1/2 cup soy sauce
- 1/4 cup light brown sugar
- 3 cloves garlic, crushed
- 1 cups low-sodium chicken broth
- 1 dried bay leaves (optional)
- 1 tablespoons arrowroot (or flour)
- 2 tablespoons fresh lime juice (from 2 large limes)
- 1 tablespoons chopped fresh parsley or cilantro
- Lime wedges to decorate :)
So first season the drumsticks with salt and pepper, and brown them lightly on a big pan or dutch oven with the garlic and a little olive oil.
In a small bowl, whisk together the vinegar, soy sauce and brown sugar and red pepper flakes.
Then pour the mix into the chicken and bring it to a boil. Add the chicken stock and basil leave. Reduce heat to medium.
Now you can go sit and relax. It'll cook by itself for about 45 minutes. All you need to do is flip the chicken every 15 minutes so that all the sides are getting all that good flavor!
When the chicken's cooked, (about 45 mins) remove the chicken and return heat to high. Add in the gravy ingredients and whisk for about 7 minutes. Pour on top of the chicken and serve it with some mashed potatoes and enjoy!!
Wednesday, March 23, 2011
Pancetta and arugula Turkey Meatloaf

- 1/2 cup plain dried bread crumbs
- 1/4 cup chopped flat-leaf pasley
- 2 large eggs, lightly beaten
- 2 tablespoons whole milk
- 1/2 cup grated Romano
- 1/4 cup chopped sun-dried tomatoes
- 3/4 teaspoon salt
- 3/4 teaspoon freshly ground black pepper
- 1 pound ground turkey, preferably dark meat
- 10 ounces sliced pancetta, about 10 slices
- 3 cups arugula, about 3 ounces
Then using a small square baking dish covered in aluminum foil, place the pancetta around the bottom and sides of the dish. Then pour the meat mixture on top of the pancetta and press it down firmly. Bake it in the over at 425o for about 45 or until the top is browned.
When you think the meat is cooked through, nice and brown, take the dish out, and flip it into a plate so that the pancetta side is up, as seen on the picture.
I'd recommend the fried polenta and some nice rice to go along with it. Make this, and I promise you will impress people...and its as always, so easy!
Butternut Squash Soup

I know what you're thinking...ew that sounds gross. Believe me, when you eat a spoon of this creamy soup, it's like being in France in a 5 star restaurant. It's just got such a sophisticated flavor, and is so simple to make. It's just plain delicious. It literally warms the soul.
- 2 tablespoons butter, at room temperature
- 2 tablespoons extra-virgin olive oil
- 1 medium onion, chopped
- 1 medium carrot, peeled and chopped into 1/2-inch pieces
- 3 cloves garlic, minced
- 3 1/2 pounds butternut squash, peeled, seeded, and cut into 3/4-inch pieces (about 7 to 8 cups)
- 6 cups low-sodium chicken stock
- 1/4 cup chopped fresh sage leaves
- salt and freshly ground black pepper
In an 8-quart stockpot, add butter and oil and melt together over medium-high heat.
Add the onion and carrot and cook, stirring occasionally, until the onion is soft, about 5 minutes.
Then, stir in the garlic and cook about 1 minutes.
Add the squash and the chicken stock.
Bring the mixture to a boil and add the sage.
Continue to boil until the vegetables are tender, about 20 minutes.
To garnish it, I sliced a piece of baguette (bread), rub a garlic clove on it, sprinkly sage and added a piece of fontini cheese on top and toasted it for a couple minutes.
I made some for my parents, and they had seconds :)
Sausage and Peas Manicotti
An awesome spin for those of you who are Italian food and pasta lovers!
This is a really great stuffed Manicotti. It's a little different then your usual manicotti because it uses sweet Italian sausage instead of meat and instead of stuffing it with regular cheese, its a creamy cheesy sauce made with heavy cream. And the peas just add an extra sweet crunch, that's just an absolute must have in the recipe. I really loved this, and Kev did too :)
You wanna boil them for about 8-10 minutes or until they're au dente- not too soft.
Drain and set aside.
Meanwhile, on a medium pan, medium-heat, cook the sausage in 2 tsp of olive oil, shallots and garlic. After about 20 mins. or when they're beginning to brown, add the wine and scrape the bottom of the pan and cook for about 2 more minutes. Turn heat off and add peas and ricotta cheese. Set aside.
Fonduta:On another pan, on medium heat, simmer the milk and heavy cream whisking constantly. Add the ricotta cheese and continue whisking for about 8 minutes. Remove from fire and stir in basil.
Poor about half (1/2 cup) of the fonduta in the pan with the sausage mixture and stir.
In a large baking dish (9x13) spread a little marinara to cover the bottom so the manicotti don't stick.
You have to be very gentle with the manicotti or it'll break easily. Holding them in your hand, began to stuff the manicotti with the sausage mixture and place them in the dish.
Don't over stuff the manicotti, or it'll break. When placing the manicotti, make sure they are tightly together so that it covers the whole bottom of the dish.
Pour marinara to cover the top of the manicotti. Then poor the remaining of the Fonduta (cream sauce) on top.
Sprinkle mozzarella on top and drizzel olive oil over it.
Bake on 350 for 30 minutes.
You'll probably have some left overs but these babies will be good in the fridge for about a week.. and trust me, you'll want to eat them everyday till they're gone!
Hope you enjoy!!! :D
This is a really great stuffed Manicotti. It's a little different then your usual manicotti because it uses sweet Italian sausage instead of meat and instead of stuffing it with regular cheese, its a creamy cheesy sauce made with heavy cream. And the peas just add an extra sweet crunch, that's just an absolute must have in the recipe. I really loved this, and Kev did too :)
- 3/4 cup milk
- 1/2 cup heavy cream
- 6 ounces (about 3 cups) grated Pecorino Romano
- 1/4 cup chopped fresh basil leaves
- 1 pound sweet Italian sausage, casings removed
- 1 large or 2 small shallots, finely chopped
- 2 cloves garlic, minced
- 1/4 teaspoon kosher salt, plus 1/2 teaspoon
- 1/4 teaspoon freshly ground black pepper, plus 1/4 teaspoon
- 1/4 cup white wine, such as Pinot Grigio
- 3/4 cup (4 ounces) frozen petite peas, thawed
- 1/2 cup whole milk ricotta
- 12 manicotti shells
- 1 (26-ounce) jar marinara sauce
- 2 cups (8 ounces) shredded mozzarella
You wanna boil them for about 8-10 minutes or until they're au dente- not too soft.
Drain and set aside.
Meanwhile, on a medium pan, medium-heat, cook the sausage in 2 tsp of olive oil, shallots and garlic. After about 20 mins. or when they're beginning to brown, add the wine and scrape the bottom of the pan and cook for about 2 more minutes. Turn heat off and add peas and ricotta cheese. Set aside.
Fonduta:On another pan, on medium heat, simmer the milk and heavy cream whisking constantly. Add the ricotta cheese and continue whisking for about 8 minutes. Remove from fire and stir in basil.
Poor about half (1/2 cup) of the fonduta in the pan with the sausage mixture and stir.
In a large baking dish (9x13) spread a little marinara to cover the bottom so the manicotti don't stick.
You have to be very gentle with the manicotti or it'll break easily. Holding them in your hand, began to stuff the manicotti with the sausage mixture and place them in the dish.
Don't over stuff the manicotti, or it'll break. When placing the manicotti, make sure they are tightly together so that it covers the whole bottom of the dish.
Pour marinara to cover the top of the manicotti. Then poor the remaining of the Fonduta (cream sauce) on top.
Sprinkle mozzarella on top and drizzel olive oil over it.
Bake on 350 for 30 minutes.
You'll probably have some left overs but these babies will be good in the fridge for about a week.. and trust me, you'll want to eat them everyday till they're gone!
Hope you enjoy!!! :D
I'M BAAAAAAAAAAAACK :D
I just couldn't take it any longer! I had to get back to writing recipes and cooking again. it's going to be tough because I have a million things going on with school, but I'm gonna try hard to keep the blog up!
The cool thing this time is, I'm trying to eat super healthy lately...ya know, bathing suit season and all... :/ and since there aren't many healthy GOOD-TASTING recipes out there, I've come up with a lot on my own and would LOVE to have you guys share some with me as well....
but I still have to please Kevin's taste buds of course, so there'll still be lots of yummy stuff for you non-healthy folks too.
Yay! so good to be back!!!
xoxo
Friday, December 3, 2010
Finals week... :/
I know i know I'm slacking... I promise I will put thanksgiving dinner recipes and the cheesecake recipe up. I just have about a million finals right now and there's just no time :( I promise as soon as I can I'll be back guys!
Meanwhile however, YOU CAN GIVE ME SOME OF YOUR RECIPES!!! :D
Meanwhile however, YOU CAN GIVE ME SOME OF YOUR RECIPES!!! :D
Sunday, November 28, 2010
Thanksgiving Dinner Part I
Since it's late, I'll post our thanksgiving menu just to make your mouths water. Tomorrow I will write all the recipes, tips and things I've learned that are must, and that we should cut out from next thanksgiving.
CHANEY THANKSGIVING FEAST
Turkey
THE BEST honey hickory smoked ham you will ever have! ;)
Mac n Cheese with breadcrumb topping
New twist on your old canned (yuck!) green bean casserole
Made from scratch Cranberry sauce ---------------------------->
Sausage and Corn bread stuffing
Mrs. Cindy's special mashed potatoes
Deviled eggs
Broccoli and Cheese Casserole
Marshmallow stuffed coconut/orange sweet potato balls (amazing!)
Fruit Salad with a Ricotta Cream that is so light and fluffy it will blow your mind
Pecan pie
Chocolate pie
Everything made from scratch...no canned anything :)
CHANEY THANKSGIVING FEAST
Turkey
THE BEST honey hickory smoked ham you will ever have! ;)
Mac n Cheese with breadcrumb topping
New twist on your old canned (yuck!) green bean casserole
Made from scratch Cranberry sauce
 ---------------------------->
Sausage and Corn bread stuffing
Mrs. Cindy's special mashed potatoes
Deviled eggs
Broccoli and Cheese Casserole
Marshmallow stuffed coconut/orange sweet potato balls (amazing!)
Fruit Salad with a Ricotta Cream that is so light and fluffy it will blow your mind
Pecan pie
Chocolate pie
Everything made from scratch...no canned anything :)
What a Turkey weekend!
Hey guys, so we just got back to Pensacola from Missouri about an hour ago. We had SUCH an amazing time!! There really is nothing in the world like spending time with family. It's so sad so many people take it for granted. Specially when you have such an awesome family like me and Kevin do, you should spend time with them as much as you possibly can! They really do enrich your soul and bring you so much joy.
We had our actually thanksgiving dinner on Friday afternoon since everyone from out of town was arriving late that thursday. On Thursday, me and Mrs. Cindy (mother-in-law) did some last minute shopping as well as preparing some things for the meal on Friday. We baked pecan pies and chocolate pies and some corn bread for the stuffing. AND even managed to watch the Patriots totally demolish the Lions in between! (okay, so maybe we didn't demolish them like we should have...Come on, they're the LIONS, but we won, so I'm not gonna complain....)
On Friday, we all woke up and had a quick breakfast and soon got to the kitchen for cooking. My mom pretty much did all the chopping, which to me, is the hardest part, so it was a huge help. And she's one of those cooks that just magically chops everything into identical perfect sizes. Which is perfect so everything gets cooked evenly. She did such a great job :)
Me and Mrs. Cindy kind of divided the different dishes among ourselves...like, she did the mac n cheese and mashed potatoes since they were her specialties, and then helped me with a new green bean casserole dish I had come up with. Everything just worked out so perfectly.
It was probably one of the most special, fun, and exciting memories I'll ever have. It's my dream to one day (hopefully soon :) have a huge house with a huge kitchen and dining room and entertain family at holidays, so this was a small way of accomplishing that dream. The recipes all came out so good, and nothing seemed to have gone wrong. For the first time, I had no over-baked veggies, or ANYTHING burnt :O ... it was all...perfect.
Then at night time, we opened Christmas gifts since it won't all see each other for Christmas. Opening presents is such an exciting time for me because I'm such an emotional person. Any little small act of kindness will totally trigger my tear glands and I will be boohooing in no time. I got some awesome gifts this year: an Amazing Bulova watch from daddy...that one of course made me cry... Ray bans and Miss Me jeans from mom, and some awesome latte mugs that I had been dying for that match my kitchen. I also got something that I had been wanting since I've began cooking...every girls dream= kitchen Aid stand mixer :D along with a Bridal edition Cook Book that I pretty much read all in the 12 hr drive and learned more than Ive ever known about cooking; a waffle maker (Kev loved that) from his grandparents; and so many more awesome gifts that if I were to name I'd be here until midnight. I hope everyone knows how thankful I am for all of them though. This really was one of the best Christmas Ive had as far as gifts go... and last year I got Tiffany's so that's saying alot! lol. it's like everyone just knew exactly what I wanted and needed. So thanks guys! :D
On Saturday we got up and went to Silver Dollar City in Branson Missouri. I'd been there last year and loved it, but this year was the first year going with my parents and the entire Chaney family (minus grandparents) and it was so much fun and so special.
To imagine that this is the just the beginning of the Holidays and in 2 weeks I will be in Brasil with my grandparents and family that I haven't seen in 5 years, and that will meet my husband for the first time and his brother, sister, mom and dad, and we will all spend Christmas together....wow. It's definitely going to be the best Christmas I've ever had.
Thanksgiving Dinner recipes coming up :D!
Tuesday, November 23, 2010
THANKSGIVING BON BONS:D
So this week, since I need to do some blogging assignments for class I figured I would do a little more sharing and a little less recipes... Don't worry, I'll post recipes at the end :)
Tomorrow morning me and Kevin will be headed on our 12 hour drive to Missouri to spend Thanksgiving with his family. My mom and dad will also be driving from Charlotte, NC to spend the weekend with us also. It'll be the first thanksgiving we all spend together since we have been married :D
I am ESPECIALLY excited about this thanksgiving because 1. my wonderful mother-in-law let me make up a menu for thanksgiving dinner and I am helping cook everything! :D I am soooooooo excited for this! All of us ladies in the kitchen cooking up a big feast...its just going to be such an awesome dream for me!
2. because since me and Kevin, my parents, and half of his family are going to Brasil for Christmas this year, we will actually be opening presents and doing our Christmas early. We'll have thanksgiving dinner on Friday, decorate the tree, then open gifts!! How exciting is that!!
and 3. because I love my family! They are SUCH a blessing in my life and getting to go home and see everyone is so refreshing and much needed. Pensacola's been very lonely :( Me and Kevin both miss everyone a lot!
Well, be praying that we'll have a safe trip! It's suppose to get down to the 30s on Thursday so I'm also excited to FINALLY bring out my boots, scarfs and coats, since Pensacola won't give me any kinda cold weather to wear them! :/
I'll keep you guys posted on how the weekend's going. Hopefully I'll have time in between all the cooking and thanksgiving/christmas festivities!
xoxo,
Gabriela
I wouldn't dear blog without leaving a recipe behind!
here are some special bon bons I made to take the fam for a nice little treat after dinner!

In a large bowl, cream butter and brown sugar until light and fluffy.
Beat in vanilla, and gradually add flour, alternately with milk, beating well after each addition. Stir in Chocolate chips and pecans. Shape into 1-in. balls; place on waxed paper-lined baking sheets. Loosely cover and refrigerate for 1-2 hours or until firm.
In a microwave-safe bowl, melt the candy coating; stir until smooth. Dip the balls in coating, allowing access to drip off; place on waxed paper-lined baking sheets. Refrigerate until firm, about 30 mins. If you want, you can remelt remaining candy coating and drizzle over candies (This was a step I was not able to master yet :/ , but it doesn't change the flavor at all so...no worries :)
Store in the refrigerator.
The flavorful filling at the center of these yummy candies tastes like genuine chocolate chip cookie dough...without the worry of uncooked eggs. Plus, they're SO easy to make!
Tomorrow morning me and Kevin will be headed on our 12 hour drive to Missouri to spend Thanksgiving with his family. My mom and dad will also be driving from Charlotte, NC to spend the weekend with us also. It'll be the first thanksgiving we all spend together since we have been married :D
I am ESPECIALLY excited about this thanksgiving because 1. my wonderful mother-in-law let me make up a menu for thanksgiving dinner and I am helping cook everything! :D I am soooooooo excited for this! All of us ladies in the kitchen cooking up a big feast...its just going to be such an awesome dream for me!
2. because since me and Kevin, my parents, and half of his family are going to Brasil for Christmas this year, we will actually be opening presents and doing our Christmas early. We'll have thanksgiving dinner on Friday, decorate the tree, then open gifts!! How exciting is that!!
and 3. because I love my family! They are SUCH a blessing in my life and getting to go home and see everyone is so refreshing and much needed. Pensacola's been very lonely :( Me and Kevin both miss everyone a lot!
Well, be praying that we'll have a safe trip! It's suppose to get down to the 30s on Thursday so I'm also excited to FINALLY bring out my boots, scarfs and coats, since Pensacola won't give me any kinda cold weather to wear them! :/
I'll keep you guys posted on how the weekend's going. Hopefully I'll have time in between all the cooking and thanksgiving/christmas festivities!
xoxo,
Gabriela
I wouldn't dear blog without leaving a recipe behind!
here are some special bon bons I made to take the fam for a nice little treat after dinner!
Chocolate chip/Pecan/Cookie Dough Bon Bons

-1/2 cup butter, softened
-3/4 cup packed brown sugar
-1 tsp vanilla extract
-2 cups all -purpose flour
-1 can sweetened condensed milk
-1/2 cup miniature semisweet chocolate chips
-1/2 cup chopped pecans (or walnuts)
-1 pound dark chocolate candy coating, coarsely chopped
-3/4 cup packed brown sugar
-1 tsp vanilla extract
-2 cups all -purpose flour
-1 can sweetened condensed milk
-1/2 cup miniature semisweet chocolate chips
-1/2 cup chopped pecans (or walnuts)
-1 pound dark chocolate candy coating, coarsely chopped
In a large bowl, cream butter and brown sugar until light and fluffy.
Beat in vanilla, and gradually add flour, alternately with milk, beating well after each addition. Stir in Chocolate chips and pecans. Shape into 1-in. balls; place on waxed paper-lined baking sheets. Loosely cover and refrigerate for 1-2 hours or until firm.
In a microwave-safe bowl, melt the candy coating; stir until smooth. Dip the balls in coating, allowing access to drip off; place on waxed paper-lined baking sheets. Refrigerate until firm, about 30 mins. If you want, you can remelt remaining candy coating and drizzle over candies (This was a step I was not able to master yet :/ , but it doesn't change the flavor at all so...no worries :)
Store in the refrigerator.
The flavorful filling at the center of these yummy candies tastes like genuine chocolate chip cookie dough...without the worry of uncooked eggs. Plus, they're SO easy to make!
Monday, November 15, 2010
Fail Proof Fudge!
 Guess who just learned to make some delicious fudge :)!!! After Kevin's been begging me for EVER since its his favorite snack I finally decided to make it. I couldnt find a recipe that sounded right at first... and after hearing so many horror story and unsuccessful bakes I was scared to make it... but I kind of just changed a little from a basic recipe and used some helpful hints and it turned out DELICIOUS!
Now, me being a Smores fanatic and not really liking fudge much myself, I did half of this recipe Fudge Smores...Even better! That way your true fudge fans can have their simple chocolate fudge and those of you who like a little more and dont like just plain fudge can eat the other half!
So its super simple..
In a small calphalon or non stick pot over the lowest heat possible add:
-3 tbsp of unsalted butter (room temperature and cut into small cubes)
-1 cup of semi-sweet chocolate morsels
-1/2 cup of dark chocolate (or bittersweet chocolate) morsels
-1/2 cup of regular chocolate morsels
-1 can of sweetened condensed milk
-1 tsp of vanilla extract
Stir constantly for about 7-8 minutes...it takes a little while, but i promise it will eventually all melt! Just don't get impatient and turn up the heat cus then youre in trouble ;)
When it's all melted remove from heat and set aside.
Then line a small square pan with foil paper, letting the edges fall over on sides.
Grease the foil lined pan on bottom and all sides with a little butter using the help of a paper towel.
If you want to do the smores: on half the pan, put down Graham cracker squares and then place small marshmallows on top.
Then pour fudge on pan evenly spreading it to all edges.
Refrigerate for 2 hours and then using your left over foil on the sides pick up the fudge and remove the foil from under it. Cut into even squares.
This really is such an easy and delicious treat to make! I hope you will try! Kevin LOVED them!
Easy NO MESS Chicken Legs--every wife's dream :)

Chicken legs are, to me, the best part of the chicken. Yeah wings are great, but its got so little meat!! Chicken thighs are meaty and its got the dark meat part of the chicken which has much more flavor than the white.
So, the other day I wanted to make some yummy dinner but was really tired and didn't want to deal with the mess. I came up with this easy way to make these legs in 3 different ways with no mess at all to clean! :D it's every wife's dream...
So using 9 chicken legs...
-Line a big baking pan with foil paper and coat with a little non-stick spray
-in one plastic Ziploc bag combine: 3 tbsp grated parmesan cheese, 1 tbsp of melted butter, 1 tbsp of minced garlic, 2 tbsp olive oil, parsley, salt and pepper to taste, and 1 tbsp of chicken bouillon. ***Add 3 legs (one at a time) to the bag and shake untill nicely coated and place over on baking pan. When all are done pour remaining dressing on top of the 3 legs.
-on 2nd plastic bag, combine: 1 tbsp of brown sugar, 2 tbsp soy sauce, 2 tsp of sesame oil, 1 tbsp of lime juice, 1 tbsp olive oil, salt and pepper to taste. Repeat ***
-on 3rd batch, you'll need 3 plastic bags- one bag with 1 cup of flour---one bag with one egg beaten---one with 3/4 cup of panko break crumbs and 1/4 cup of Parmesan cheese grated, salt and pepper. First dip leg on flour, then on bag with egg, and lastly dip it on the bag with bread crumbs until fully coated. Do this for all remaining legs.
- For a nice side snack with these, simply cut up some Idaho potatoes into wedges and place them on top or to the side with the chicken legs and spread lots of olive oil on them, salt and pepper--they come out soft and crispy and GREAT! and go great with the chicken!
Remove from foil and discard foil and ziploc bags leaving you with NOOOO dishes to clean!!!! :D
These are great on game nights (when you specially dont want to be cleaning up mess while watching the game) with some ranch dressing for dipping and a nice cold beer :)
Sunday, November 7, 2010
Fran's Doce de Leite
My sweet little cousin Francine gave me a recipe for one of my favorite hard candy from Brasil. There is a liquid form of this also, but the hard form is even better!
So, to make DOCE DE LEITE...
-1 can of sweetened condensed milk
-(using the condensed milk can) 2 cans of sugar
-1 tbsp of butter
Bring all to medium heat in a pot, mixing constantly. When sugar starts to barely burn (gettng a little harder) pour it over on a flat surfaced dish that you've had refrigerated for a few minutes. (dish, or plate must be cold) Let it sit for a couple minutes, then cut the "doce de leite" into small 2-4 in. squares. Refrigerate for 5 minutes or until it's hardened, pull apart pieces off the plate!
Thanks Fran!!
Saturday, November 6, 2010
A heavenly afternoon treat!
Sorry it took a while to have another recipe posted... school, holiday festivities and the flu have been keeping me away from cooking lately. Aaaaandddd I'm still waiting on some recipes people!!! :D
This is something really easy you can make in like 30 minutes that is so full of flavor and a little different than your usual afternoon snack!
Cheesy Scones with Turkey Pate'
Something about Scones just gives me that feeling that I'm just a little more special than to eat just plain bread. I love all kinds of scones! I've never made sweet ones and would LOVE to have a recipe for some that are as yummy as the Starbucks ones so I dont have to keep spending 5 bucks on them...lol
I have just learned how to make some easy cheesy ones that will make you feel like you're back at grandmas house eating homemade southern-style heaven! And if that weren't good enough, I complimented them with some pate to spread on top of them that my daddy taught me how to make :)!
So first you will need for the Scones:
-3 cups flour
-1 n 1/2 tbsp baking powder
-1 n 1/2 tsp of salt
-3/4 cup of heavy cream (or buttermilk)
-1/2 lb of cheddar cheese (small diced)
-1/3 lb of cold butter
-3 large eggs beaten
-1/2 cup of (oregano, dill...whatever kind of herbs you like, it'll give it a nice flavor!)
Mix dry ingredients(flour, b. powder, and salt) together, than add the butter and mix on slow speed. It should look like a bunch of little tiny balls. Mix eggs and cream together then slowly add them to flour/butter mixture. Then add the cheese and herbs until nicely mixed together.
(this next step is optional... I have found that if you want to skip it, it doesn't make a big difference and saves you a big mess.. but its up to you!)
-Spread a little flour on a surface, than knead the mixture until all is well-incorporated.
Then, either use a 2-in cutter and cut out squares, or take an ice cream scoop and place them on a baking pan (either w/ parchment paper, or lightly greased).-Make an egg wash with one egg and a tbsp of water and brush over top of scones
-Bake on 400F for 20 to 25 minutes until outside is golden brown!
For the PATE (super easy!)
-In a blender or food processor, put in 1 cup of your favorite sandwich meat... turkey, ham, chicken, tuna. Whatever you'd like. It can be sliced, but it works a little better if they're diced. Then add a/b 1 cup of mayonnaise, a tbsp of mustard, 1/3 cup of pitted olives, a couple celery sticks if ya have them, oregano, salt and pepper to taste. Mix all until it has a pasty texture. You can refrigerate it for a few minutes if you'd like. Pates are suppose to be served cold.
Spread it on top of your delicious scone and voi-la'! You have a yummy afternoon snack or lunch that will take you less than 30 minutes to make!
I have to make breakfast for our Sunday school class tomorrow so I'm going to try some poppy-seed crumble muffins... Made it up and I don't know if those will go together but I'm going to try! lol I'll tell you the recipe tomorrow depending on how they turn out. :)
Friday, October 15, 2010
"You can't look at a cupcake without smiling" :D
Little cupcake hints
(for my friend Danny ;)
These are some ways I have tried when making cupcakes that just make them extra special! Its so simple and makes such a big difference.
First, one little secret many people don't know is the sour cream trick. Alot of people think "ew, gross" but adding sour cream to cakes and cupcakes can make such a huge difference in how much more moist the cake becomes. I'm not talking about a whole cup here people. Just a couple tbsps.http://www.blogger.com/post-edit.g?blogID=7083039798842004967&postID=7430702669411490650
Find a good recipe that you like. This might take many batches of bad cupcakes.
My all time favorite cupcake recipe that I've recently found and tweaked it a little is just a simple moist vanilla cupcake. Vanilla cupcakes are the best bc you have a lot of room to play with the topping and fillings!
-1/2 cup unsalted butter, softened -1 cup white sugar -1 room temperature egg - 1 teaspoon vanilla extract -1 1/2 cups of flour - 1 teaspoon baking powder - 1 cup milk - 1 teaspoon of sour cream - 1/2 teaspoon salt (this is necessary in any desserts. Salt brings out the sweetness in sweets! Just like adding 1/2 tsp of sugar in your salty foods brings out the saltiness!)
-Start out creaming the butter, sour cream and sugar. then beat in the egg and vanilla. Then *sift* the flour, baking powder and salt and beat it all together adding the milk slowly. (sometimes you'll feel like you don't need a whole cup. That's fine.)
-After your dough looks smooth, use an ice cream scoop to put them in paper liners. Bake @ 350 for about 20-30 mins. You just have to keep an eye on it. When the sides start turning golden its ready; or just keep checking until a toothpick comes out clean.
So then, when you find a recipe you love, It might not be the same as mine, but here are some little things you can do to add flavor to your cupcakes:
-These are some of my favorite!!! Using the batter above: separate the cupcakes into 3 different bowls. It will usually make about 9 cupcakes. (these are pretty big cupcakes, so if you want to make little ones just separate them into more paper liners)
--leave one bowl just regular batter, and place them in the cups
--mix 1/4 cup of sweetened shredded coconuts and 1/4 cup of mini choc. chip in one bowl and beat it for a second just to mix it. (coconut chocolate chip cupcakes)
--and in the other bowl, mix 1/4 cup of powdered cocoa and 1/4 cup of marshmallows. (marshmallow chocolate cupcakes)
-Place them in the paper liners and you'll have 3 different kinda of cupcakes with just one batter by adding a couple yummy treats to each! Trust me, these are all to die for!!
-Strawberry jelly cupcakes: after you've placed the batter inside the paper liners, add a dime size drop of jelly in the middle and just barely press it down and then bake it like you normally would. The surprise filling is always a treat when people get to the middle of the cupcake. You can do this with any kind of jelly!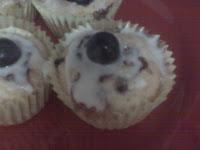
-cutting up small pieces of fruits like cherries or blueberries and mixing it in with the batter is also a great way to make cupcakes more flavorful.
Easy toppings:
Store bought frosting is so yuck! and homemade frosting is SO much better tasting and so easy to make! So save up your money and take 5 mins to make these delicious frosting that will make your cupcake much much more special and you can say you made an entirely home-made cupcake!
DE-LI-CIOUS CREAMY chocolate frosting: (will make ab..1 1/2 cups)
-1 bar cut into pieces of unsweetened chocolate (melted, and cooled) OR mix 1/2 bar of unsweet and 1/2 bar of white chocolate, even better!
-1/2 can sweetened condensed milk -1/4 cup of water - 1/4 tsp of vanilla extract - 1/2 cup heavy whipped cream (if its not whipped, beat it separately first) -1/2 pack of instant chocolate or vanilla pudding (this really makes it delicious!)
--blend chocolate and cond. milk.
--Gradually whisk in water, vanilla and the pudding. Then you'll want to just fold the whipped cream in,(mix it in very softly)
For just a regular butter-cream frosting, I use:
-2 tbsp of flour -1/2 cup milk -1/2 tsp of vanilla extract -1/2 cup sugar -1/2 cup butter
-In a small sauce pan, cook the milk and flour stirring constantly until it forms into a ball and then cool it.
-separately beat together butter and sugar until fluffy and add the two mixtures together and beat it until smooth.
-You'll probably have to refrigerate it for about 1/2 and hour until it becomes spreadable.
Always make sure you frost your cupcakes after they've been cooled.
A good trick to make cupcakes (or cakes) more moist, is to stick them in the freezer for about 30 mins after making them and them letting them defrost again before eating them. It really does wonders!
-This will be a never ending post. As soon as I come up with more things, I'll add it on here! This is just the start for our cupcakes!
Let me know if you have any questions or if you want to add anything yourselves! I'm dying for new recipes!! :D
(for my friend Danny ;)
These are some ways I have tried when making cupcakes that just make them extra special! Its so simple and makes such a big difference.
First, one little secret many people don't know is the sour cream trick. Alot of people think "ew, gross" but adding sour cream to cakes and cupcakes can make such a huge difference in how much more moist the cake becomes. I'm not talking about a whole cup here people. Just a couple tbsps.http://www.blogger.com/post-edit.g?blogID=7083039798842004967&postID=7430702669411490650
Find a good recipe that you like. This might take many batches of bad cupcakes.
My all time favorite cupcake recipe that I've recently found and tweaked it a little is just a simple moist vanilla cupcake. Vanilla cupcakes are the best bc you have a lot of room to play with the topping and fillings!
-1/2 cup unsalted butter, softened -1 cup white sugar -1 room temperature egg - 1 teaspoon vanilla extract -1 1/2 cups of flour - 1 teaspoon baking powder - 1 cup milk - 1 teaspoon of sour cream - 1/2 teaspoon salt (this is necessary in any desserts. Salt brings out the sweetness in sweets! Just like adding 1/2 tsp of sugar in your salty foods brings out the saltiness!)
-Start out creaming the butter, sour cream and sugar. then beat in the egg and vanilla. Then *sift* the flour, baking powder and salt and beat it all together adding the milk slowly. (sometimes you'll feel like you don't need a whole cup. That's fine.)
-After your dough looks smooth, use an ice cream scoop to put them in paper liners. Bake @ 350 for about 20-30 mins. You just have to keep an eye on it. When the sides start turning golden its ready; or just keep checking until a toothpick comes out clean.
So then, when you find a recipe you love, It might not be the same as mine, but here are some little things you can do to add flavor to your cupcakes:
-These are some of my favorite!!! Using the batter above: separate the cupcakes into 3 different bowls. It will usually make about 9 cupcakes. (these are pretty big cupcakes, so if you want to make little ones just separate them into more paper liners)
--leave one bowl just regular batter, and place them in the cups
--mix 1/4 cup of sweetened shredded coconuts and 1/4 cup of mini choc. chip in one bowl and beat it for a second just to mix it. (coconut chocolate chip cupcakes)
--and in the other bowl, mix 1/4 cup of powdered cocoa and 1/4 cup of marshmallows. (marshmallow chocolate cupcakes)
-Place them in the paper liners and you'll have 3 different kinda of cupcakes with just one batter by adding a couple yummy treats to each! Trust me, these are all to die for!!
-Strawberry jelly cupcakes: after you've placed the batter inside the paper liners, add a dime size drop of jelly in the middle and just barely press it down and then bake it like you normally would. The surprise filling is always a treat when people get to the middle of the cupcake. You can do this with any kind of jelly!

-cutting up small pieces of fruits like cherries or blueberries and mixing it in with the batter is also a great way to make cupcakes more flavorful.
Easy toppings:
Store bought frosting is so yuck! and homemade frosting is SO much better tasting and so easy to make! So save up your money and take 5 mins to make these delicious frosting that will make your cupcake much much more special and you can say you made an entirely home-made cupcake!
DE-LI-CIOUS CREAMY chocolate frosting: (will make ab..1 1/2 cups)
-1 bar cut into pieces of unsweetened chocolate (melted, and cooled) OR mix 1/2 bar of unsweet and 1/2 bar of white chocolate, even better!
-1/2 can sweetened condensed milk -1/4 cup of water - 1/4 tsp of vanilla extract - 1/2 cup heavy whipped cream (if its not whipped, beat it separately first) -1/2 pack of instant chocolate or vanilla pudding (this really makes it delicious!)
--blend chocolate and cond. milk.
--Gradually whisk in water, vanilla and the pudding. Then you'll want to just fold the whipped cream in,(mix it in very softly)
For just a regular butter-cream frosting, I use:
-2 tbsp of flour -1/2 cup milk -1/2 tsp of vanilla extract -1/2 cup sugar -1/2 cup butter
-In a small sauce pan, cook the milk and flour stirring constantly until it forms into a ball and then cool it.
-separately beat together butter and sugar until fluffy and add the two mixtures together and beat it until smooth.
-You'll probably have to refrigerate it for about 1/2 and hour until it becomes spreadable.
Always make sure you frost your cupcakes after they've been cooled.
A good trick to make cupcakes (or cakes) more moist, is to stick them in the freezer for about 30 mins after making them and them letting them defrost again before eating them. It really does wonders!
-This will be a never ending post. As soon as I come up with more things, I'll add it on here! This is just the start for our cupcakes!
Let me know if you have any questions or if you want to add anything yourselves! I'm dying for new recipes!! :D
There's nothing like mama's cooking!
Mama's Famous Lasagna
If you've eaten it before, your mouth is already starting to water just thinking about it. And if you haven't yet, trust me, you'll want to try this recipe! Everyone loves my mom's lasagna!
-In a large pot, boil a box of lasagna noodles until tender and drain.
-In a separate pot, saute a little bit of chopped onions and garlic in olive oil.
-Add about 1lb. of ground beef and cook it until its no longer red and turns a light brown.
-drain some of the water out from the pot, and add with the meat- 1 can of evaporated milk; 1/2 can of tomato sauce; 1 chicken bouillon cube, salt and pepper and a little oregano.
-(the secrete to the sauce is to put the evaporated milk in the freezer for a few minutes before and then once you add it to the sauce, as soon as it boils, remove it from the burner. This keeps it from getting runny and being more creamy)
-Then in a large casserole dish you begin to build the layers. You will need about 1/2 lb. of sliced smoked ham and 1 large bag of shredded mozzarella cheese.
-First "grease" the pan with a little bit of the meat sauce.
1.-Then start with one layer of the lasagna noodles. Placing them side by side. Most of the time, you'll need to cut the noodles in half so that you can have the whole dish covered.
2.-Next spread the meat sauce on top of the noodles.
3.-Make little 1 in. pieces of the ham slices and place it on top of the sauce.
4.-After its covered in ham, spread the shredded cheese on top of the ham till it covers it.
(Remember: you're going to do at least 3 layers, so don't use all the ham and all the cheese on the first layer.)
-repeat steps 1-4 until you can't make any more layers. The very top of the lasagna should be the last step with the cheese, and you'll want to make sure the top is fully covered in it!
-Bake it in the oven at 350 for about 45 mins or until the cheese has turned a golden brown.
Take it out, let it cool, and Bom Apetiti!
I promise you, it'll probably become your favorite meal ever. It's mine! :D And everyone will ask you for seconds, thirds and probably fourths!
Thanks mama! ;)
Thursday, October 14, 2010
"Wine makes a symphony of a good meal!"-F.Garvin
Super Easy Delicious White Wine Sauce
Just finished cooking and eating dinner with Kev, and ran over here to share this yummy sauce I just came up with. I started out with some Turkey polska kiełbasa (it's less fattening than just regular smoked sausage and tastes the same!) And I decided to pair it with some angel hair noodles. Kielbasa already has so much flavor, so I didn't want to do a strong tasting sauce, but I didn't want to just do an olive oil base either.
So, in a small pot, I first sauteed about 1/4 cup of onions in minced garlic and 2 tbsp of olive oil. Then I added to the pot about 1 cup of white wine (pinot grigio is what I tried with, but I'm sure most white wines will work!), 3/4 can of "creme de leite" (crema), which you can find at most grocery stores here, but you can also use about 3/4 cup of heavy cream; I have powdered chicken bouillon and I used maybe a little more than 1 tbsp, so I think 1 whole cube might be a little too much. (I use this in EVERYTHING btw, its amazing!); 1 tbsp of butter, a little salt, and some parsley.
I was about to find more stuff to add thinking it wasn't going to be tasty enough, when I tasted and it was SOOO good! I used Kevin, my brutally honest husband, to double check thinking for sure he was going to say "it's okay", but he loved it!
After the noodles were cooked and I had sauteed the kielbasa in some olive oil, I joined the noodles and the sauce and put the kielbasas on top. It was a great, super-easy dinner!
Brasilian Pamonha
Pamonha is a super delicious, super traditional dish in Brasil. Corn is its main ingredient. It’s got the same texture as if you were to mix cream of corn and cornbread together, and it tastes similar to it too. The tricky part of pamonha and why a lot of people have difficulty making it is the traditional way that you’re suppose to cook the pamonha inside the husks in steam. But I figured out a much easier way to make this treat and make it taste just the same but without the hassle!
-To start, use 4 cups of fresh corn kernels from 4 ears. Just take the husks out and run a knife through the kernels. (it's better to use fresh corn instead of canned because they are more firm and make the texture overall much better.)
-Use a blender to puree the corn kernels.
-Then in a large mixing bowl, beat together until smooth ½ cup of SOFTENED UNSWEETENED butter, about 2 tablespoons of regular butter, a generous ¼ cup of sugar, 2 tbsp of softened cream cheese, and ¼ cup of milk.
-Then add 1 egg, ¼ tbsp of salt and ¼ tbsp of baking powder into the mix and blend well
-finally add: ¼ cup of cornstarch and the corn puree. Blend until it's a smooth mixture.
This is the part where in Brasil, you’re suppose to put about 3 tablespoons of the mixture into the husks, fold them together and steam them for about an hour. But I’ve found that the corns in Brasil must be bigger than the ones we find here because the husks aren’t big enough to hold the mixture. And even when making it in Brasil, its just a very complicated mess!
SO, instead, I put the mixture inside a small greased casserole dish, and baked it! It turned out THE EXACT same and SO yummy!
-I let it bake on 375 for about 45 minutes I think. I had to keep checking it. Stick a knife or tooth pick in it after about 35 mins. and if it comes out clean and the top is golden brown and starts cracking then it should be ready. But be patient, it might take a while. It's hard to explain how the texture should be because its different then a cake or pie or anything like that. It's almost like a little bit harder mousse texture.
-When its done, take it out the oven and let it cool for a few minutes. It should be eaten warm. (If you have left-overs, reheat it before eating it the next day:)
-Now if you can get your hands on some “queso fresco” it's the BEST combination for Pamonha! The two together is the equivalent of the American peanut butter and jelly!
I hope you will enjoy!!
Subscribe to:
Posts (Atom)